¶ OrderXpress
OrderXpress a powerful Shopify app crafted specifically for wholesale and distributor customers to streamline their ordering process. OrderXpress features an intuitive grid format that allows users to quickly and efficiently place large orders, saving valuable time and effort.
Designed for efficiency and ease of use, OrderXpress enhances the wholesale buying experience, helping businesses optimize their operations and focus on what matters most. Try OrderXpress today and transform the way you handle bulk orders! More Info
¶ Why your store needs it right now?
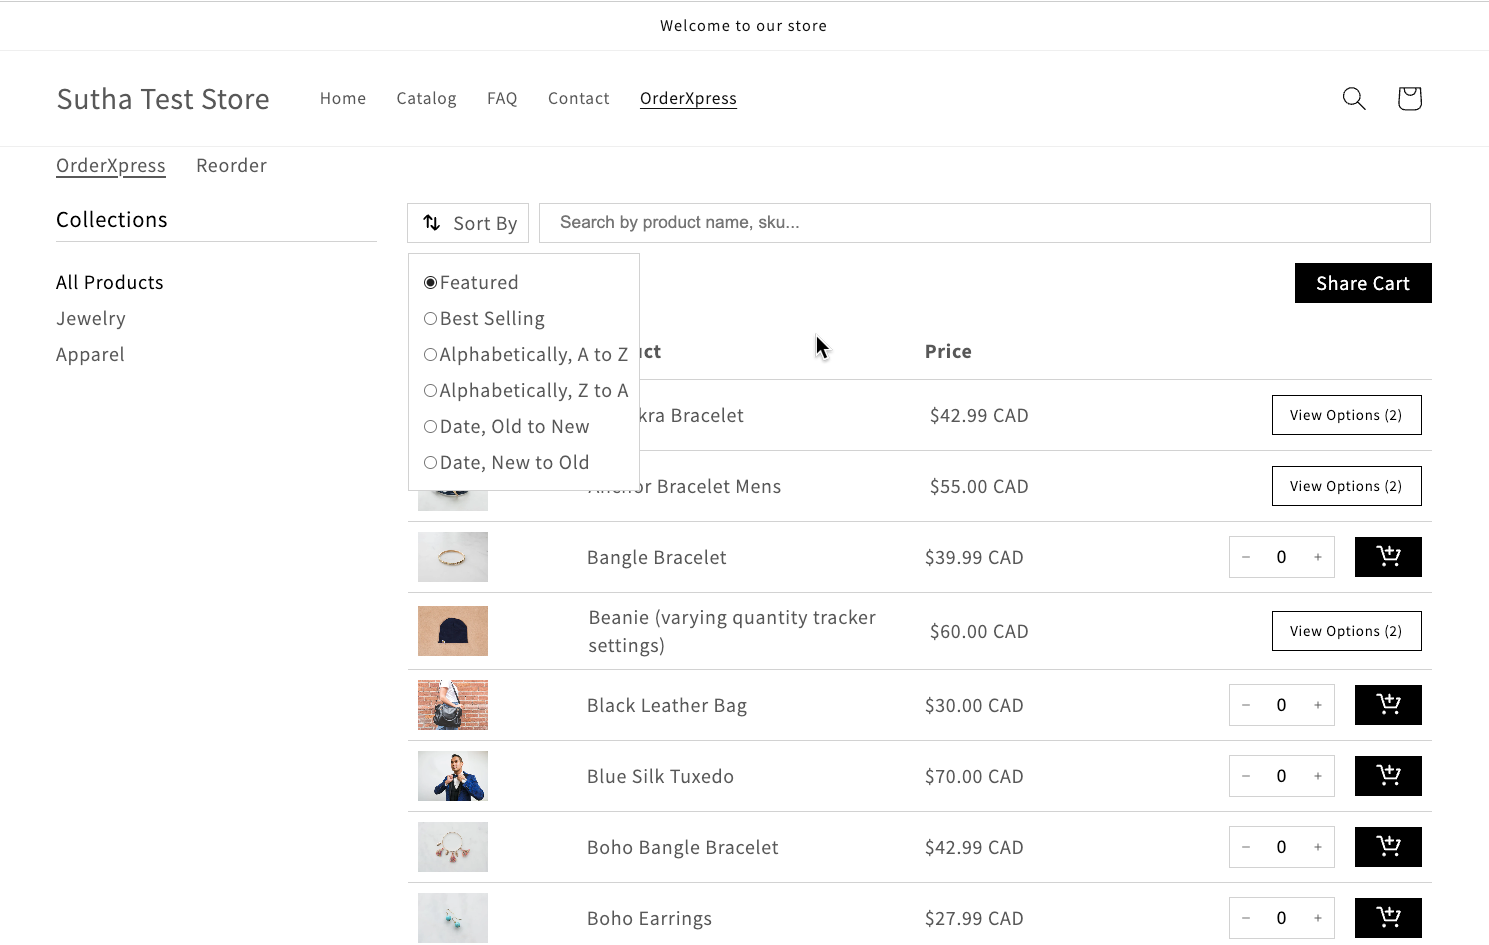
Your store needs OrderXpress to streamline the shopping process, enabling customers to easily select and bulk add product variants via a grid format. This tool not only simplifies purchases for those seeking multiple variants but also boosts average order values. OrderXpress enhances customer satisfaction and efficiency. Implementing it can markedly improve your store's functionality and appeal to bulk buyers.
¶ Features
- OrderXpress Grid: Simplifies the order placement process with an easy-to-use grid interface, making it simple to add multiple products to the cart in just a few clicks.
- Reorder Option: Enables customers to quickly reorder previous purchases, ensuring a seamless restocking process without having to manually select each item again.
- Share the Cart: Allows users to share their cart with others, facilitating collaboration and approval processes within their organization.
- Easy Integration: Seamlessly integrates into your Shopify store, with a straightforward setup process through the theme customization options.
¶ Installation
Quick Install Guide for OrderXpress on Shopify
- Log Into Shopify Admin: Access your store's backend.
- Search in App Store: Find "OrderXpress" in the Shopify App Store.
- Add OrderXpress: Click "Add app" and approve the installation.
- Configure Settings: Adjust OrderXpress settings in the 'Apps' section of your Shopify admin for optimal display and functionality.
- Integrate App blocks with Theme: customize your theme to integrate OrderXpress directly onto any page.
¶ Setting up OrderXpress
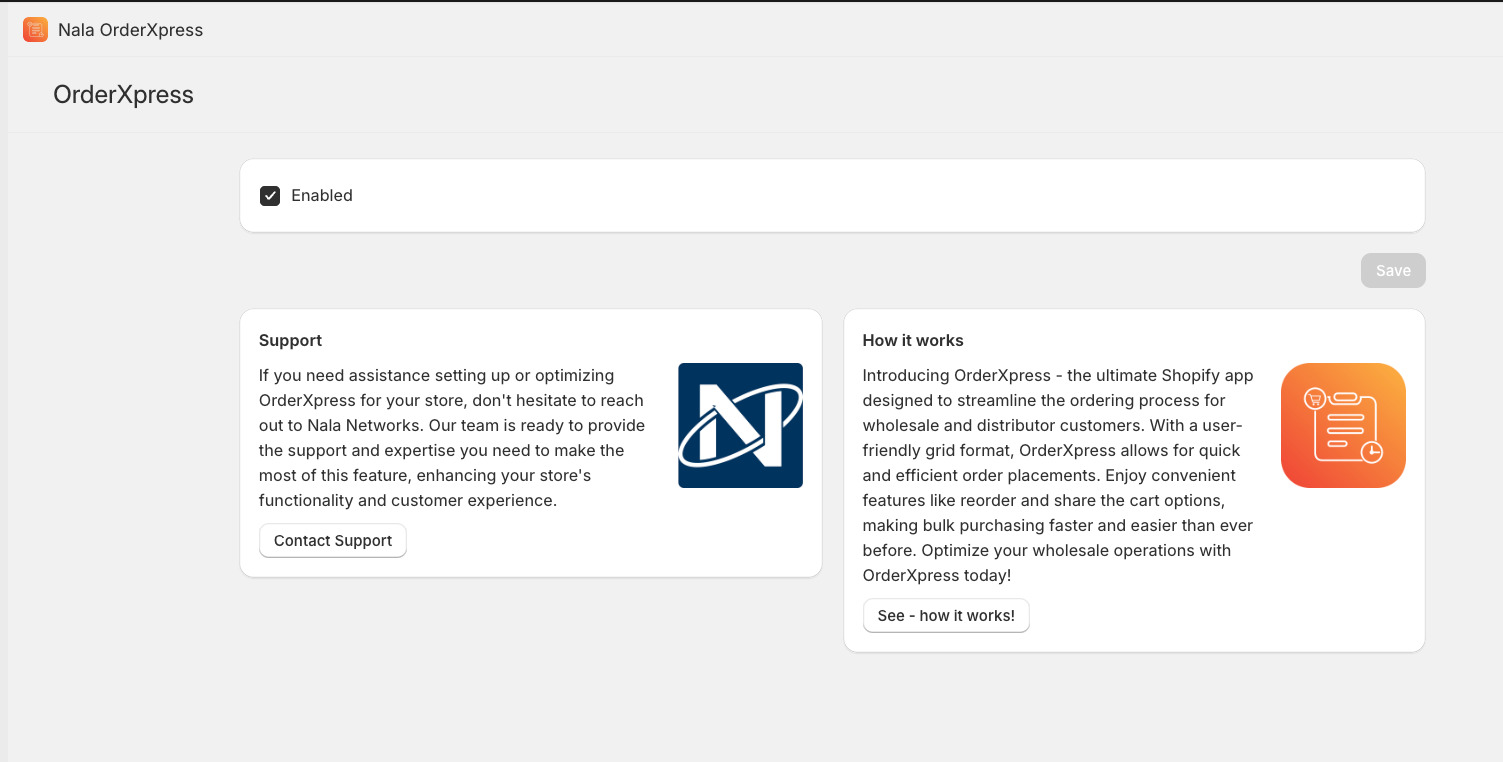
Navigate to the settings menu to toggle OrderXpress on or off. Check this video for setting up orderxpress
¶ Incorporating OrderXpress into Your Collection Page
After installing OrderXpress from the Shopify App Store, To display OrderXpress on your custom page, you must integrate the OrderXpress theme extension. you'll need the following three elements:
- Collection Template: Formats product listings and manages sorting.
- Page Template: Created based on the collection template for displaying content.
- OrderXpress Page: Built using the page template to display properly.
Here’s a detailed step-by-step guide for integrating the OrderXpress theme extension and creating a custom page in Shopify:
¶ Access the Theme Editor
- In your Shopify admin, go to Sales channels > Online Store.
- Click Customize next to your active theme.
¶ Create a Collection Template
- From the top dropdown, select Collections.
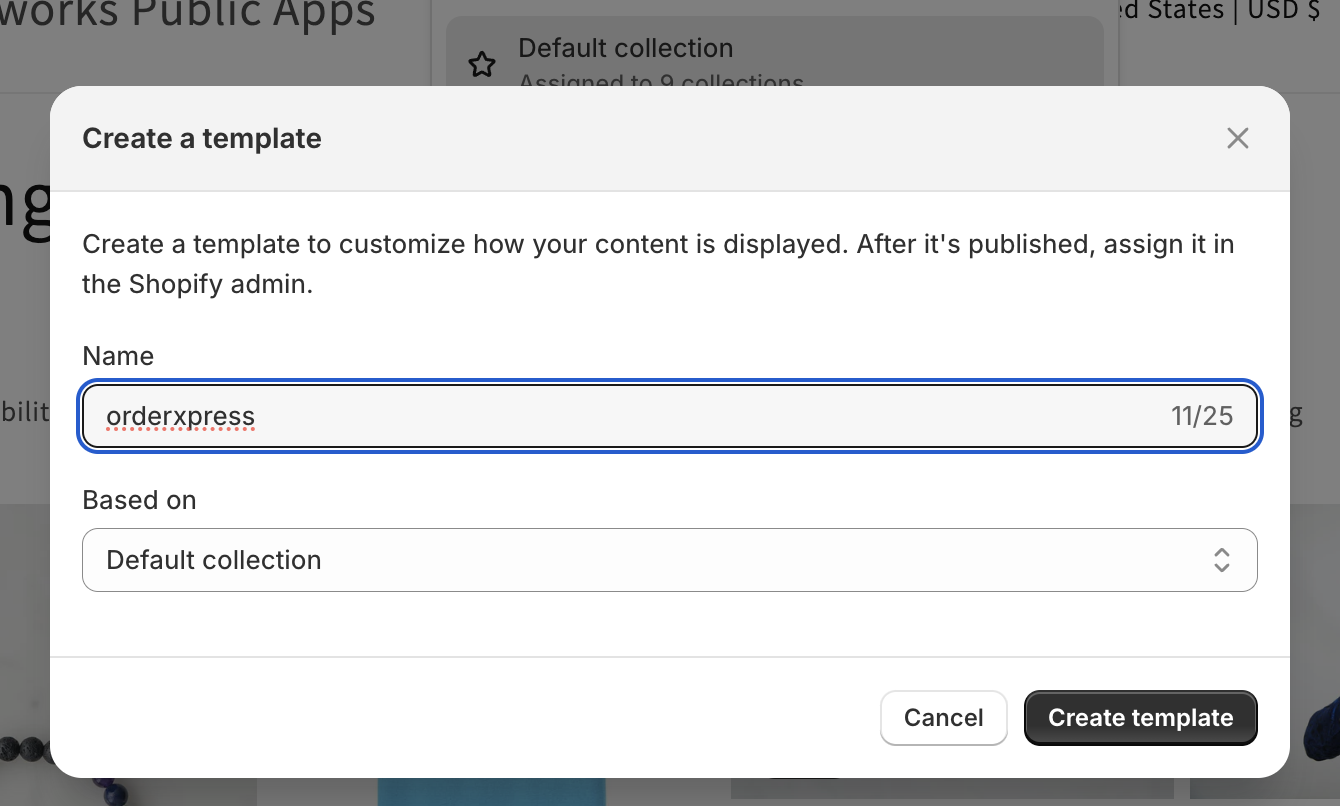
- Click Create Template, and name it (e.g., "orderxpress").
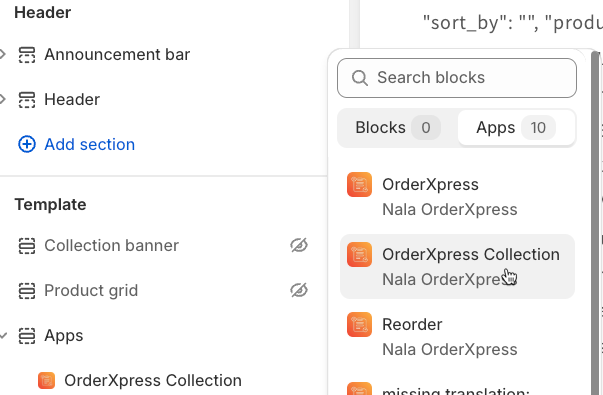
- In the left sidebar, under Template, click Add section.
- Search for OrderXpress and select the OrderXpress Collection block provided by Nala OrderXpress App.
¶ Customize Collection Template
- Once added, disable the default Collection Banner and Product Grid sections by toggling them off in the left sidebar.
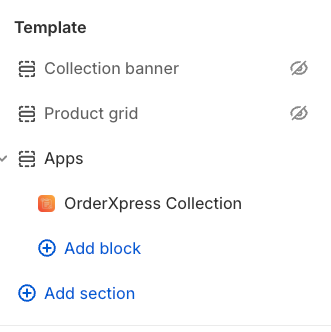
- You can further adjust settings as required (e.g., changing product grid styles or adjusting collection layout).
¶ Create a Page Template for OrderXpress
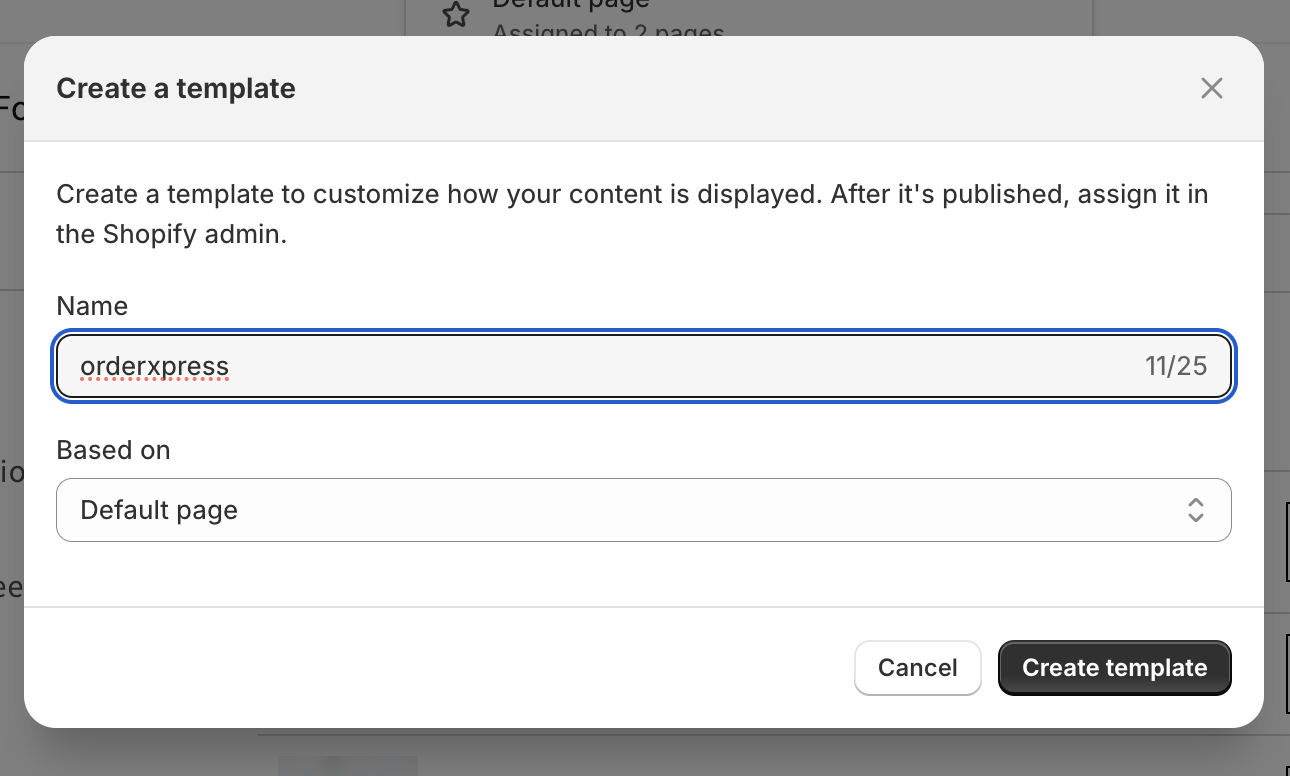
- From the top dropdown in the theme editor, select Pages.
- Click Create Template and name it (e.g., "orderxpress").
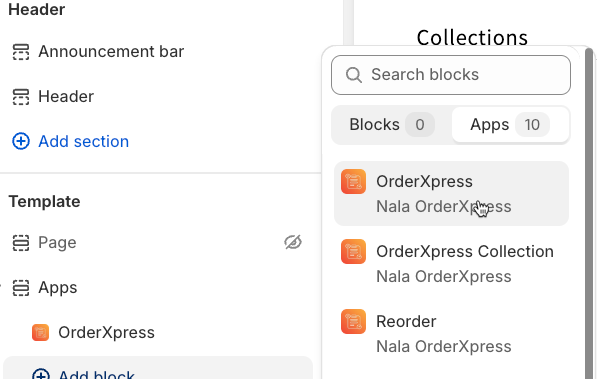
- In the left sidebar, click Add section and search for OrderXpress.
- Select the OrderXpress block from Nala OrderXpress App and disable the Page section from the default template.
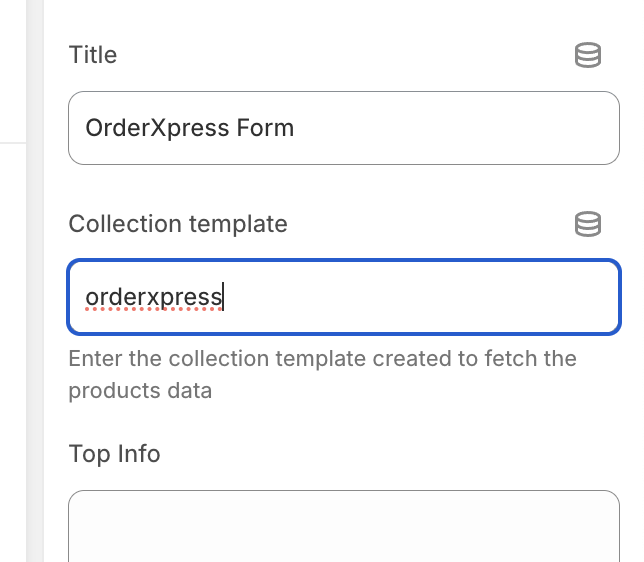
- The collection template should be same as the collection template created above. By default it will be
orderxpress
¶ Preview and Customize the Page Template
- Adjust the layout or settings of the OrderXpress block as per your requirements.
- Preview the page by selecting Preview from the editor and reviewing the display.
- Once you are satisfied with the setup, click Save to apply the changes.
¶ Create a New Page for OrderXpress Using the Template
- Exit the theme editor and return to Shopify admin.
- Navigate to Online Store > Pages.
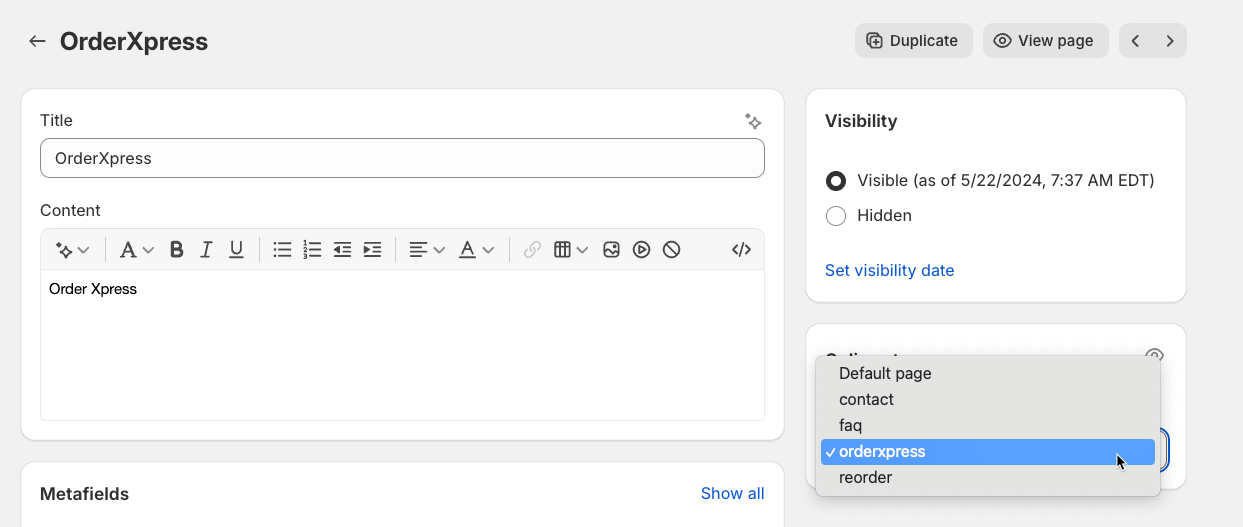
- Click Add page, name the page, and from the Template dropdown, select the newly created template (e.g., "OrderXpress").
- Save the page.
¶ Create a Page template for Reorder
- From the top dropdown in the theme editor, select Pages.
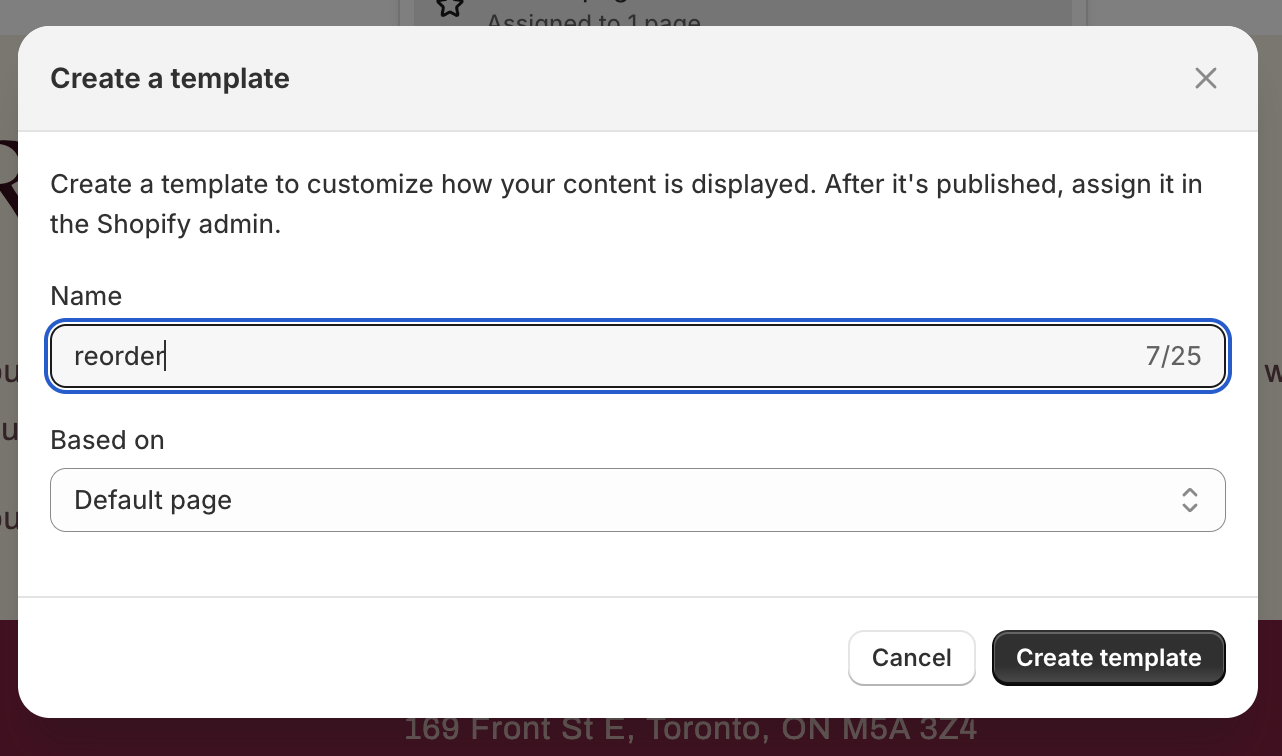
- Click Create Template and name it (e.g., "Reorder").
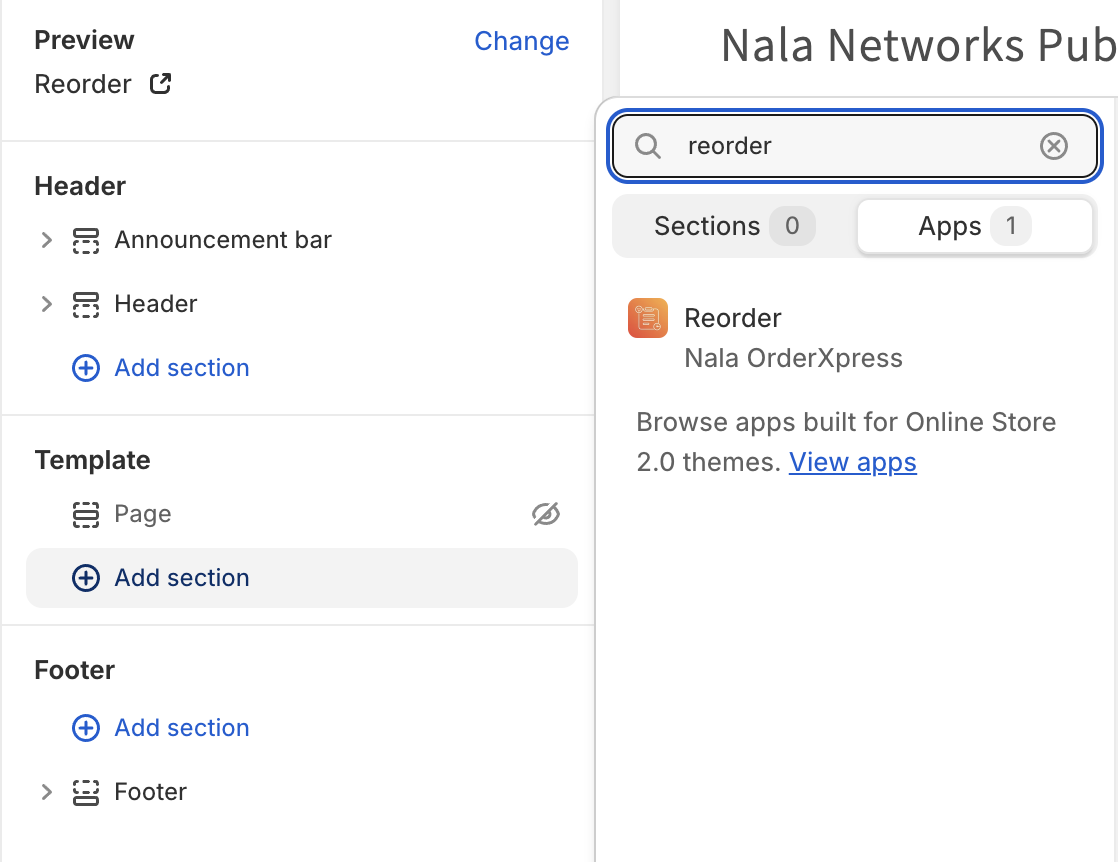
- In the left sidebar, click Add Apps block and search for Reorder App block.
- Select the Reorder block from Nala OrderXpress App and disable the Page section from the default template.
- Give title for the Reorder menu
- If you want to show the OrderXpress link on the order page link that page using configuration option
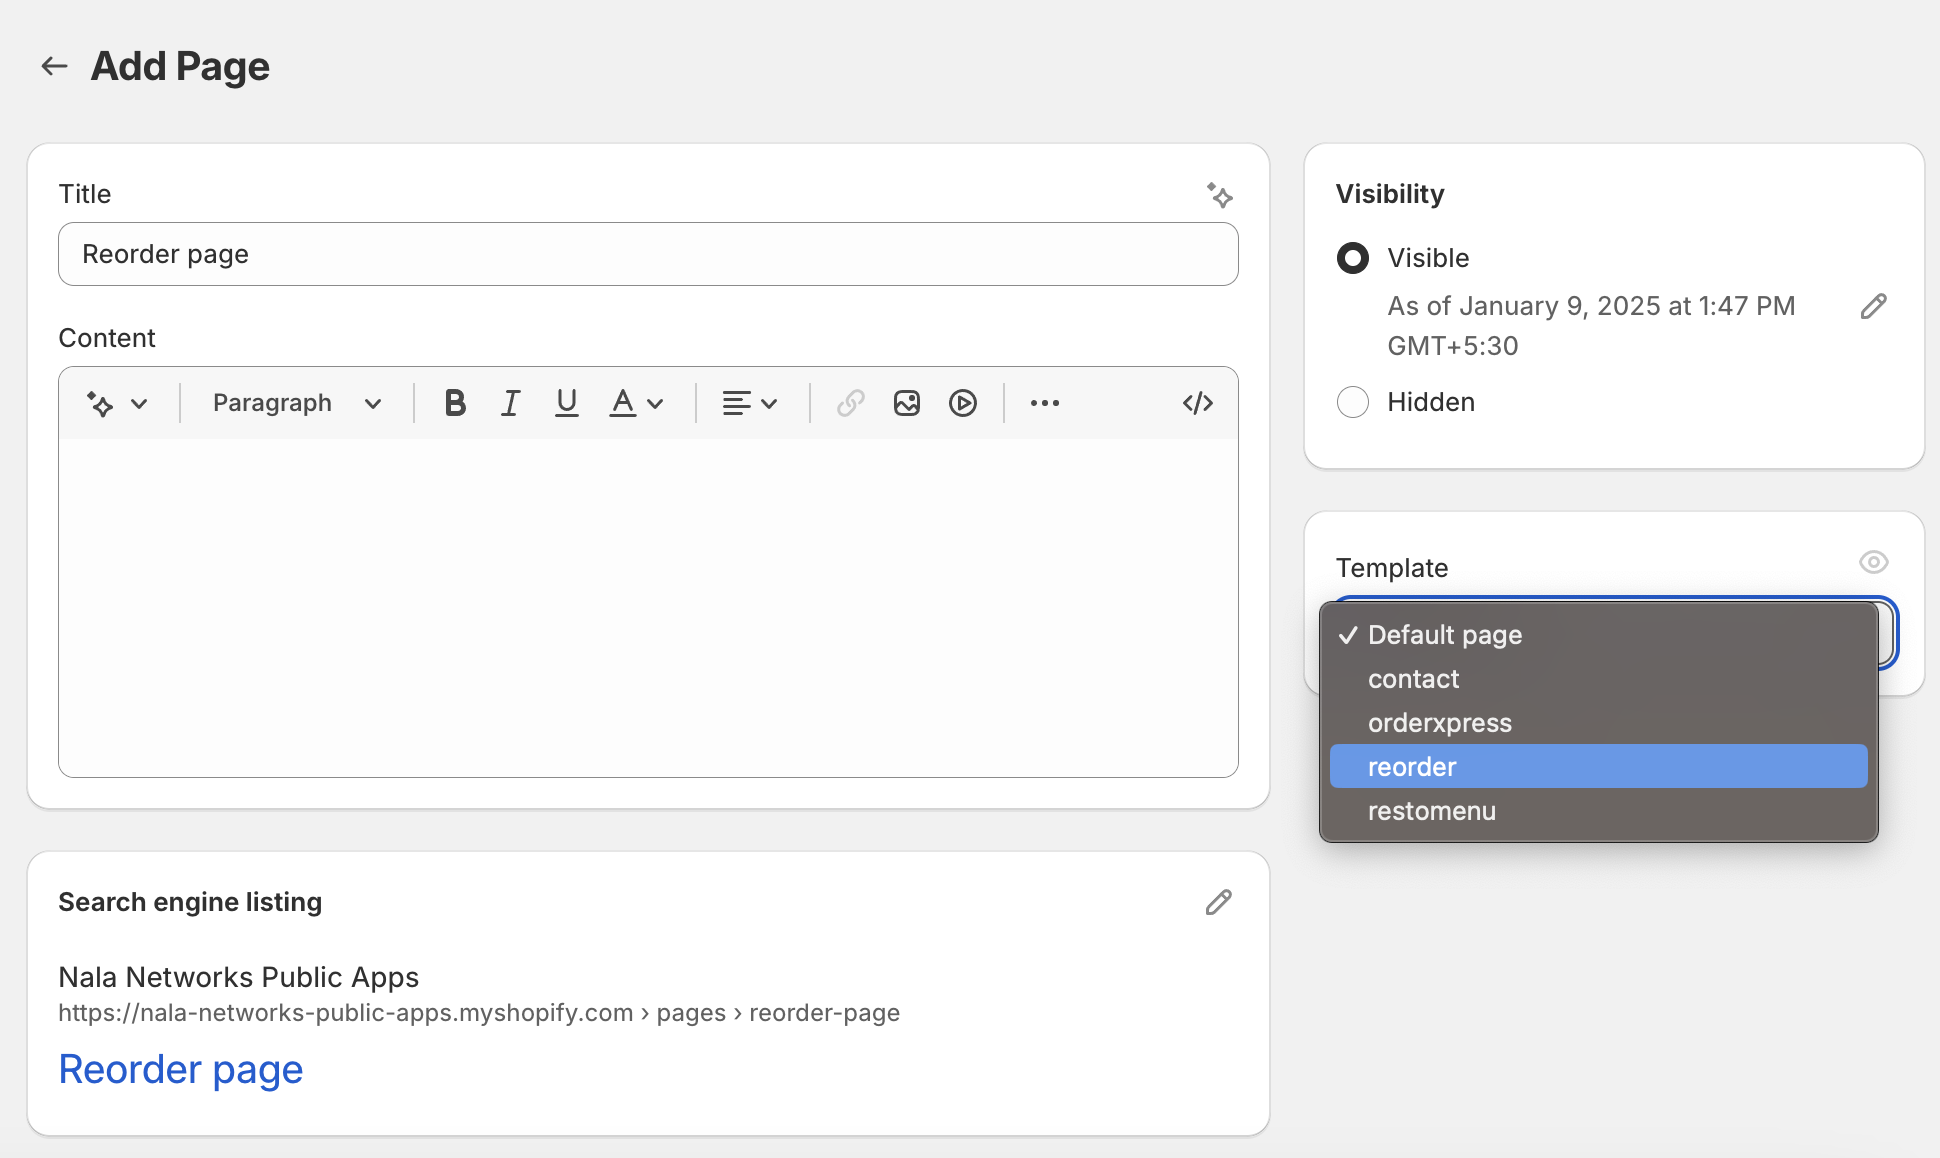
¶ Create a New Page for Reorder Using the Template
- Exit the theme editor and return to Shopify admin.
- Navigate to Online Store > Pages.
- Click Add page, name the page, and from the Template dropdown, select the newly created template (e.g., "Reorder").
- Save the page.
¶ Linking the Reorder Page to OrderXpress page
- Visit to the OrderXpress Page template
- Select the OrderXpress app block
- on the right side there is configuration saying link to Reoder page, Please select the reoder page
¶ Enabling the Share cart
- Share cart use SMTP server to send email to share the cart because of that you have to configure the SMTP setting and enable it
- After you have configured SMTP setting goto the OrderXpress page template and enable the Share a Cart on the configuration for the app block on it.
¶ OrderXpress page
Once completed, the OrderXpress grid will display correctly on your custom page using the templates you’ve created. You can now direct wholesale customers to this page for efficient bulk ordering.